
How to Prepare Your Home for a Real Estate Photography Shoot
A Simple Checklist That Makes a Big Difference in Your Listing Photos
Your real estate photographer is scheduled. The shoot is tomorrow. Now what?
The difference between good listing photos and great listing photos often has nothing to do with the camera — it has everything to do with how the home is prepared before the photographer arrives. A few hours of preparation can dramatically improve the final images and ultimately help the home sell faster and for more money.
Here is exactly what to do before your real estate photography shoot.
Why Preparation Matters More Than You Think
Real estate photography is priced competitively because it is efficient. A professional photographer moves through a home quickly, capturing every room at its best in a fraction of the time it would take most people to set up a single shot.
That efficiency depends entirely on the home being ready when we arrive.
If we arrive to a home that needs significant decluttering, rearranging, or cleaning before we can shoot, the session runs over. That doesn't just affect your shoot — it affects every agent we have scheduled after you. We run a tight schedule to keep our pricing where it is, and a home that isn't prepared is the number one reason shoots run late.
The general rule is simple: if you don't want it in the photos, put it away before we arrive.
Closets, cabinets, the garage — use every inch of hidden storage you have. Buyers are not opening closet doors in listing photos. Pack it in, close the door, and forget about it until after the shoot.
A Note on Moving Furniture and Large Items
This is important: we do not move large furniture, heavy items, or anything fragile.
This is not laziness — it is a liability issue. Moving a heavy dining table across hardwood floors can leave scratches. Shifting a large bookcase can gouge tile. Moving fragile items creates the risk of breakage. We are not insured for property damage of that nature and we will not take that risk with your listing or your client's home.
If furniture needs to be repositioned for the shoot, that needs to happen before we arrive. Small adjustments — a chair slightly angled, a decorative item moved on a shelf — are fine. Anything that requires lifting, dragging, or carrying is the seller's or agent's responsibility before shoot day.
The Night Before
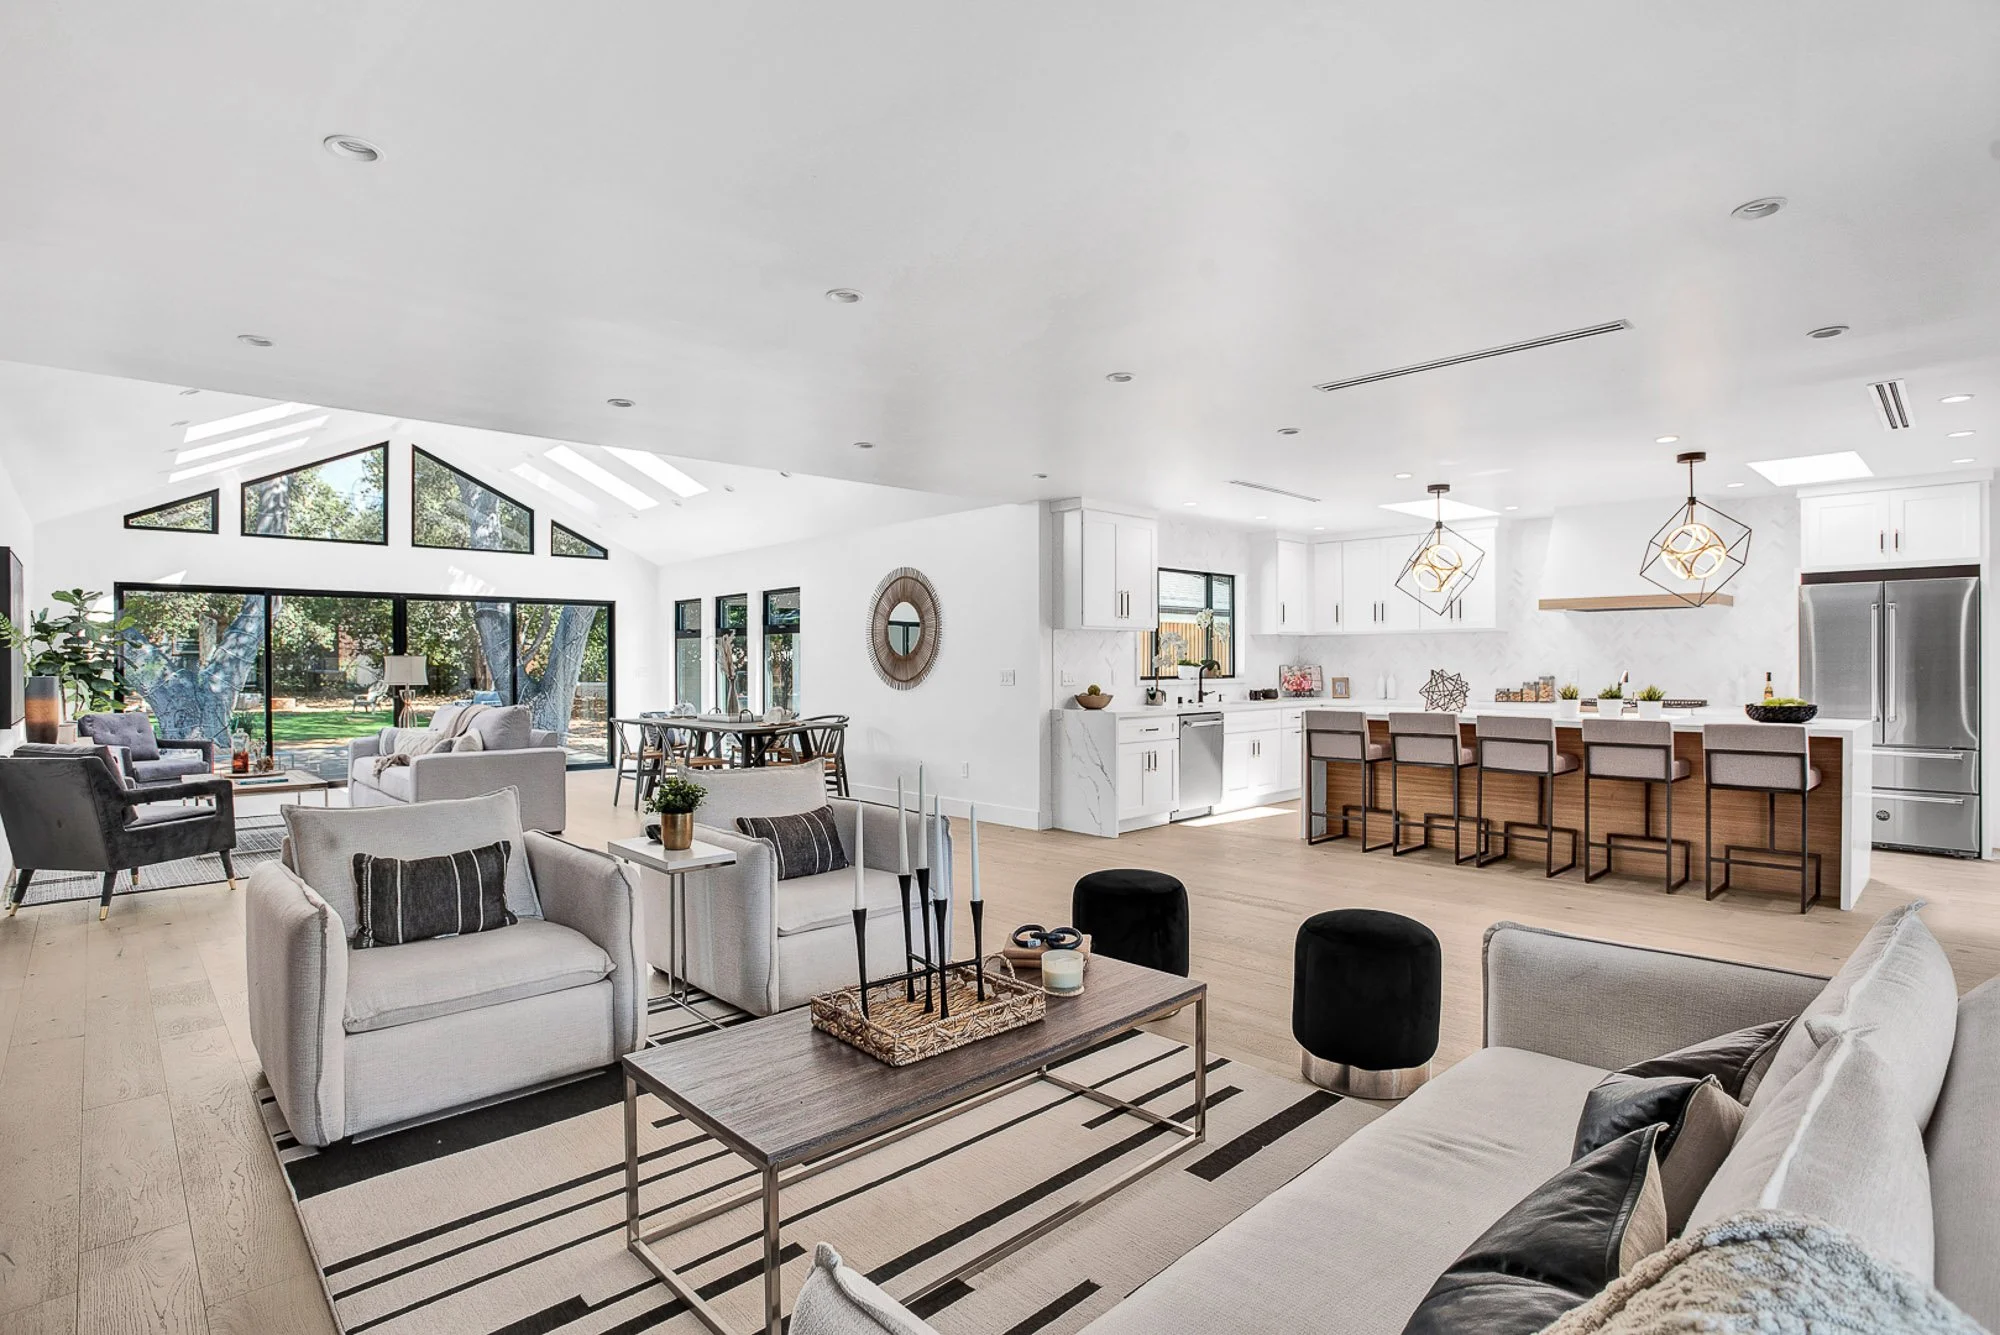
Declutter every surface. Countertops, coffee tables, nightstands, bathroom vanities — clear them all. A clean surface photographs as spacious and intentional. A cluttered surface photographs as small and chaotic. When in doubt, put it away.
Remove personal items. Family photos, kids' artwork on the refrigerator, personal mail, prescription bottles, pet bowls — anything specific to the current occupant should be removed or stored out of sight. Buyers need to visualize themselves in the home, not the current family.
Clear the kitchen counters completely. Leave nothing on the kitchen counter except perhaps a simple bowl of fruit or a clean coffee maker if it looks good. The toaster, the knife block, the dish rack, the paper towel holder — all of it goes in a cabinet for the shoot.
Remove kitchen towels and small rugs. Kitchen towels hanging from oven handles or draped over counters should be removed entirely. Small rugs in the kitchen and bathrooms should also be taken up before the shoot — they tend to make spaces look smaller and can hide flooring that photographs better without them. The one exception is if the flooring underneath is significantly dated or damaged. In that case a well-placed rug can be a strategic choice. Use your judgment — if the floor looks better covered, leave the rug. If the floor looks good, take the rug up and let it show.
Clear all products from tubs and showers. Shampoo bottles, conditioner, body wash, razors, loofahs, soap bars — everything comes out of the tub and shower before the shoot. A clean empty tub and shower photographs as spa-like and pristine. A shower lined with a dozen personal care products photographs as someone's bathroom. Remove everything and store it under the sink or in a cabinet for the duration of the shoot.
Make every bed. Every bed in every bedroom should be made as neatly as possible. Fresh linens if you have them. Decorative pillows if available. A well-made bed makes a bedroom photograph significantly larger and more inviting.
Clean all mirrors and glass surfaces. Streaks and fingerprints on mirrors, shower doors, and windows show up clearly in professional photos. Wipe every glass surface the night before and again the morning of the shoot.
Reposition any large furniture that needs moving. If a piece of furniture is blocking a doorway, crowding a room, or needs to be in a different position for the shoot — move it the night before. Do not leave it for the day of the shoot and do not expect the photographer to move it.
The Morning of the Shoot
Leave the lights off. This is one that surprises a lot of agents — but for natural light real estate photography, ambient artificial lighting can actually work against the final image. Mixed color temperatures between daylight and tungsten bulbs create unnatural color casts that take significant time to correct in editing. Leave all lights off when we arrive. We will turn on specific fixtures where the design calls for it — a statement pendant, under-cabinet lighting, a lamp that adds warmth to a living space. But the default is natural light first, and that starts with the lights off. The one exception — make sure all bulbs that are needed are working. A burned out bulb in a key fixture is something we cannot fix on location.
Open every blind and curtain. Every window treatment in every room should be fully open before we arrive. Natural light is the foundation of great real estate photography and the more of it we have to work with the better the final images will be. Do not leave this for the photographer to do room by room — open everything before we walk through the door.
Turn off all ceiling fans. Ceiling fans in motion create blur in photos and even stationary fans can be distracting in a finished image. Turn off every ceiling fan in the home before we arrive.
Remove all cars from the driveway — and in front of the home. This sounds obvious. It happens on nearly every other shoot anyway.
All vehicles should be completely off the driveway and ideally not parked directly in front of the home on the street either. A clear driveway and a clean curb line makes the home's facade look its best and gives the photographer the cleanest possible angle on the exterior.
Yes — we can remove a car from a photo in editing. But getting it right takes time, and time is an additional charge that is completely avoidable with five minutes of preparation before we arrive. Move the cars down the street, around the corner, or in a neighbor's driveway for the duration of the shoot. It makes a real difference in the final images and it costs nothing.
Put pets away. Dogs, cats, and any other pets should be crated, in the backyard, or off the property entirely during the shoot. Pet items — beds, toys, food bowls, litter boxes — should also be stored out of sight.
Take out the trash. All trash cans — indoor and outdoor — should be emptied and stored out of sight. Garbage cans in the background of an exterior shot are one of the most common and most easily avoidable listing photo mistakes.
Tidy the backyard. If the property has outdoor space, give it the same attention as the interior. Coil the hose, store any tools or equipment, arrange patio furniture neatly, and sweep any visible dirt or debris from hardscape areas.
Do a final walkthrough. Walk every room before the photographer arrives. Open every door. Look at every surface. If you see something you don't want in the photos — put it away. Closets and the garage are your best friends on shoot day.
What to Leave Out
Some items actually help the photos and should stay visible:
A simple bowl of fresh fruit on the kitchen counter
A neatly folded throw blanket on the sofa
Fresh flowers in a clean vase
A clean folded towel set in the bathroom
Outdoor furniture arranged in an inviting conversation layout
These small styling touches add warmth and livability to the images without looking cluttered or personal.
A Note on Sky Replacements
At SoCal Home Photo, sky replacement is included on every exterior shot at no extra charge. If the morning of your shoot is overcast, smoky, or the sky is flat gray — don't stress. Every exterior image will be edited with a clean blue sky in post. You don't need to reschedule over weather.
What Your Photographer Will Handle
A professional real estate photographer will make small compositional adjustments — slightly angling a chair, adjusting a decorative item on a shelf, or making small compositional tweaks to what is already in the room. These small touches are part of what we do.
What we will not do is clean, deep declutter, stage from scratch, open cabinet doors, or move heavy or fragile items. The photographer's job is to document the home at its best — and that starts with the home being ready when we walk through the door.
The Bottom Line
A real estate photography shoot is a marketing investment. The home is the product. Preparing it properly before the photographer arrives is the single most impactful thing you can do to maximize the return on that investment.
An hour of preparation the night before and thirty minutes the morning of the shoot can be the difference between photos that generate showings and photos that get scrolled past.
The formula is simple — if you don't want it in the photos, put it away.
Book your shoot with SoCal Home Photo →
Ready to Book?
SoCal Home Photo serves real estate agents across the Inland Empire and San Gabriel Valley. HDR photography, drone, video, twilight, 3D tours, and a complete listing marketing suite — all delivered next business day.